Get started
Three tracks cover the same ground: the app, where you click; the command line, one command per step; and Claude, where you say what you want and the MCP server does it. Pick the one you live in.
Before you start
- The app, at , on Base Sepolia (chain id 84532), where the dollar is
zUSD and the faucet gives ZAI and zUSD once per wallet. On your own machine,
scripts/devstack.sh reviewfrom the repository root starts a private copy instead: the local development network (chain id 31337, RPChttp://127.0.0.1:8545) with fifty demo services. - A wallet in the browser for the app's staking steps; a private key in
AIOUM_PRIVATE_KEYfor the same steps from the command line or from Claude. Agents and selling need neither. - The repository checked out and
scripts/devstack.sh setuprun once: it builds the contracts and every package (the CLI and the MCP server included), then boots the whole local network: the chain, fifty real services and every one a key in.envunlocks (.env.examplelists them), the agent runner, your private node, the app and the docs.scripts/devstack.sh updatepulls the latest, rebuilds and restarts it.
Add your keys
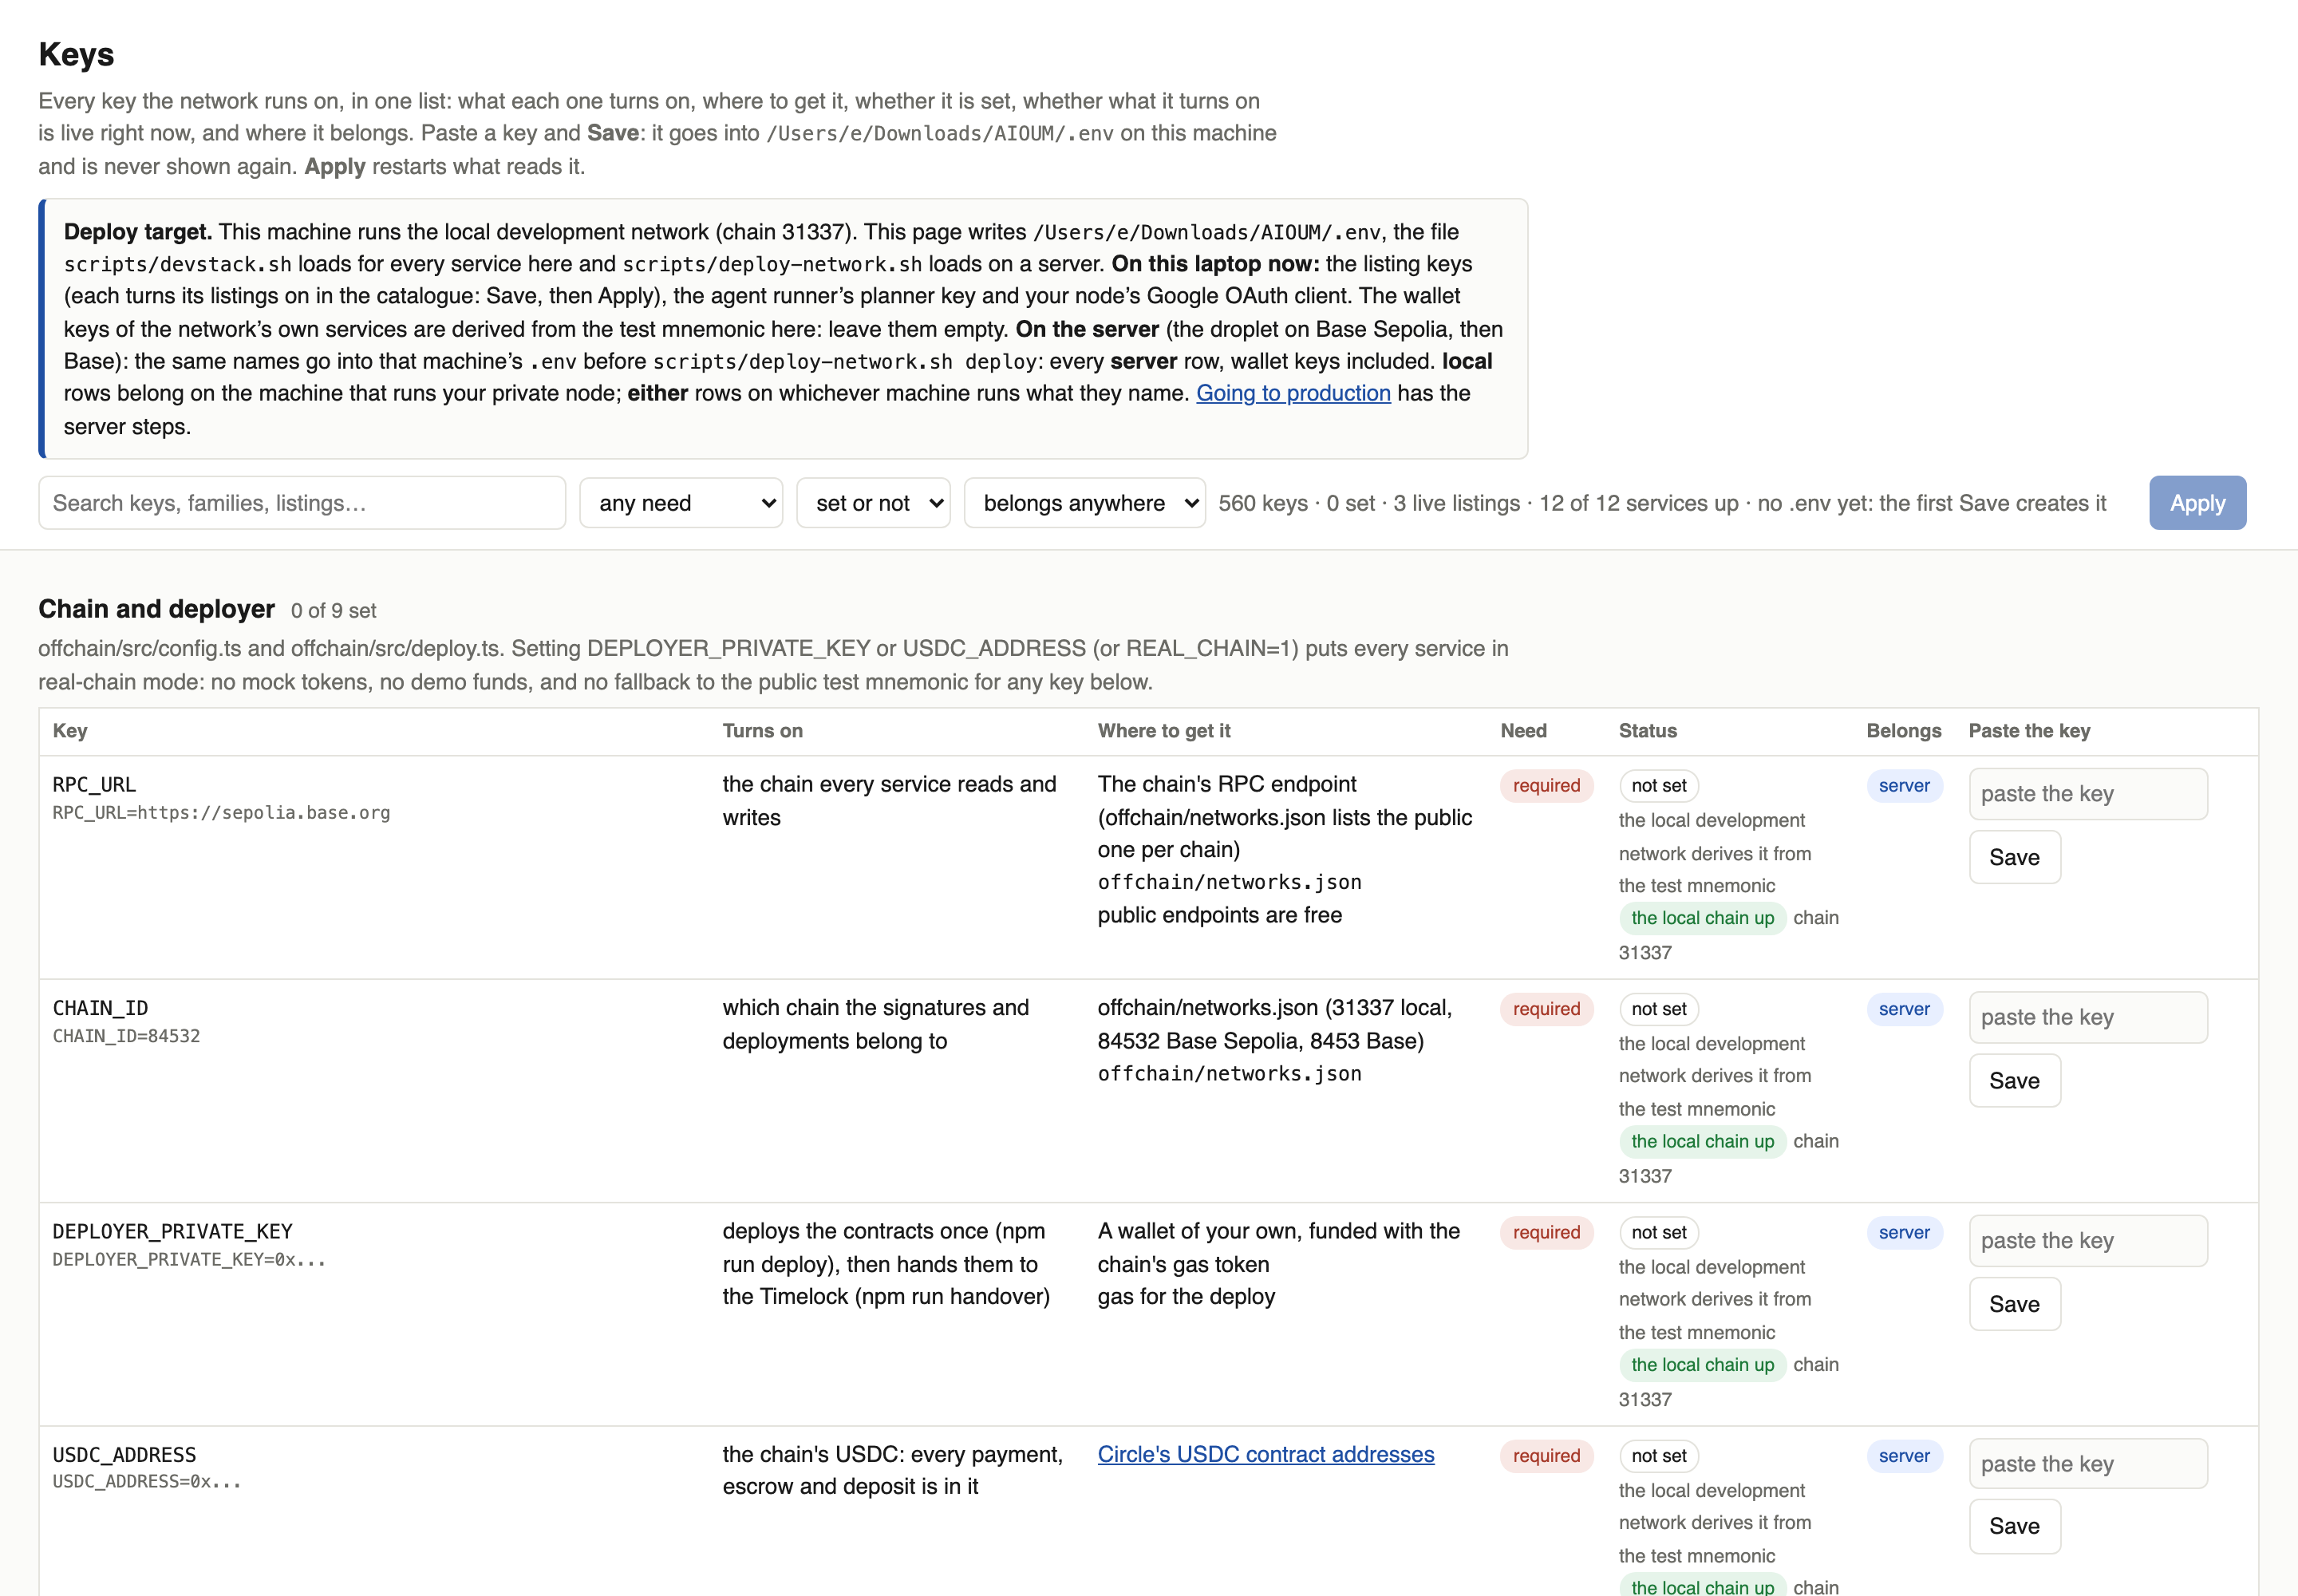
Every key the network runs on is one list on your machine: http://127.0.0.1:8590, up with the
rest of scripts/devstack.sh review (or npm run keys:console in offchain/). Each row is a key,
grouped by what it unlocks: the listings it turns on, expandable, with the ones live right now
marked; where to get it; whether it is required, recommended or optional; whether it is set; and
where it belongs: server for the network's own services and every catalogue key, local for
your private node's OAuth client and connectors, either for what both use. Paste the key and
Save: it goes into .env at the repository root, readable by you alone, and is never shown
again. Apply restarts only what reads it, the catalogue rebuilt first, and reports each service
as it comes back. A key nobody has to type: the wallet keys the local development network derives
from its test mnemonic stay empty here and go into the server's .env before
deploy.
Start
In the app the first thing you meet is Start here, four steps in order: your private node (installed with one command, on this device or on a server), what it connects to (a model, your accounts, your data, a wallet with caps), the network (the runner sees it: a green Connected), then your first job. Launch then takes anything you build step by step, and My Agents keeps every agent's record. In the app walks through them with the screens.
The three tracks
| You want to | In the app | From the command line | From Claude |
|---|---|---|---|
| Build an agent, a service or a skill, step by step: what, where it runs, then the brief or the listing | Launch | aioum super · aioum sell | Build agents by conversation |
| See every agent of yours: runs, answers, receipts, spend by service and by day, what the jobs delivered | My Agents | aioum run get | Monitoring |
| Fund your AI wallet with whatever you hold, on whichever chain you hold it | Fund your AI wallet | aioum deposit | Fund the wallet from any chain |
| Back an operator with ZAI and earn a share of what their listings are paid | Stake | aioum stake | Stake and the jury |
| List an API, a model, data or a tool and get paid per call | Sell a service | aioum sell | Sell |
| Keep your keys, memory and local tools on a machine you control | Run a private node | aioum node | Your private node |
| Build your Super Agent, watch it work live, then build one that hires it | Build an agent network | aioum agent | Build agents by conversation |
| Pick up a whole agent network with a project for the job, built from what is live | Pick up a pipeline | aioum pipeline | Pick up a pipeline by conversation |
| Wire email, calendar, keys and memory to your agents from your node | Connect local services | aioum node | Your private node |
| Watch the network: what is up, what ran, what it cost | the Activity tab on ZAI | aioum status | Monitoring |
The three tracks share one order, so a step you did in one place is one command or one sentence in the others.
Next: In the app — Start, then seven walkthroughs with the screens shown and the buttons marked.